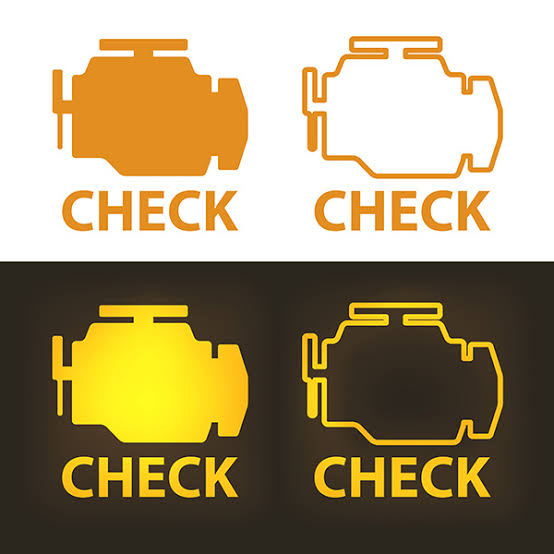
Seeing the check engine light illuminate on your dashboard can be frustrating, especially when your car seems to be running normally. In some cases, the warning appears because of a minor issue, such as a loose gas cap. In others, it signals a problem with the engine, ignition system, fuel system, or emissions controls that needs prompt attention.
If you are wondering how to reset the check engine light, the first thing to understand is that clearing the warning and fixing the underlying problem are not the same thing. Resetting the light without identifying its cause may hide an important warning temporarily, allowing a small fault to develop into a more expensive repair.
The good news is that there are several ways to reset the check engine light once the cause has been identified and corrected. This guide explains how the process works, which method to use, what to avoid, and when professional diagnosis is the safer choice.
What Does the Check Engine Light Mean?
The check engine light, also called the malfunction indicator lamp (MIL), is part of your vehicle’s onboard diagnostic system. It monitors engine performance and emissions-related components, including sensors, ignition parts, fuel delivery systems, and exhaust equipment.
When the system detects a problem, it may store a diagnostic trouble code (DTC). A mechanic or vehicle owner can retrieve this code with a compatible OBD-II scanner to help identify the source of the issue.
The light can indicate problems such as:
- A loose, damaged, or incorrectly fitted gas cap
- A faulty oxygen sensor
- Worn spark plugs or a failing ignition coil
- A malfunctioning mass airflow sensor
- An evaporative emissions system leak
- A catalytic converter efficiency problem
- An engine misfire or fuel system fault
The warning does not always mean that your vehicle is about to break down. However, you should never assume it is harmless simply because the car still drives normally.
Steady vs. Flashing Check Engine Light
A steady check engine light generally indicates that the diagnostic system has detected a fault that requires investigation. If the car runs normally and no other serious symptoms appear, you can often arrange a diagnostic check soon.
A flashing check engine light is more urgent. It often indicates an active engine misfire that can damage the catalytic converter. Reduce engine load, pull over somewhere safe, and switch off the engine if the light continues flashing or the vehicle is running roughly. Arrange roadside assistance rather than continuing to drive.
How to Reset Check Engine Light: 5 Effective Methods
Before resetting the warning, read the stored trouble codes if possible. Record them before clearing anything because the codes and related diagnostic information can help identify the fault.
1. Use an OBD-II Scanner
Using an OBD-II scanner is generally the best method for resetting the check engine light. It allows you to read diagnostic codes, investigate the problem, and clear the warning after the necessary repair.
Most gasoline-powered cars and light trucks sold in the United States from the 1996 model year onward support OBD-II, although compatibility and access can vary by vehicle and market.
What you need:
- An OBD-II scanner compatible with your vehicle
- Your vehicle’s owner manual
- A safe, parked location
Step-by-step instructions:
- Park the vehicle safely. Switch off the engine, apply the parking brake, and keep the car away from traffic.
- Locate the diagnostic port. It is commonly underneath the dashboard on the driver’s side, although the exact position varies by model.
- Connect the scanner. Plug the scanner into the OBD-II port according to its instructions.
- Switch on the ignition. Follow the scanner’s directions. Many vehicles require the ignition to be on without starting the engine.
- Read the diagnostic codes. Select the option to retrieve stored or pending trouble codes. Write down the codes and any available descriptions.
- Identify and repair the fault. Use reliable repair information for your exact vehicle. Do not replace a component based on a code alone; a code often identifies a system or condition rather than proving that one part has failed.
- Clear the codes. Once the underlying problem has been corrected, select an option such as “Clear Codes” or “Erase DTCs.”
- Restart the vehicle. Turn the ignition off and back on as directed. Check whether the warning remains off.
- Confirm the repair. If appropriate, drive the vehicle under normal conditions and recheck for returning codes. Do not drive if serious symptoms or a flashing warning are present.
Why this method is recommended: An OBD-II scanner helps you understand what triggered the warning before you erase it. Basic code readers are relatively affordable, while advanced scan tools can display live sensor data and additional diagnostic information.
Keep in mind that clearing codes can also reset emissions readiness monitors and erase useful diagnostic data. Your vehicle may need to complete specific driving conditions before those monitors report as ready again.
2. Tighten or Replace the Gas Cap
A loose or damaged gas cap is a common cause of an illuminated check engine light. The cap helps seal the fuel tank and maintain the proper pressure in the evaporative emissions system.
If the cap is not tightened correctly after refueling, the system may detect a leak and store a trouble code.
How to check the gas cap:
- Park the vehicle and switch off the engine.
- Remove the gas cap and inspect its seal for cracks, dirt, or visible damage.
- Reinstall the cap and tighten it according to the manufacturer’s instructions.
- If the seal is damaged or the cap does not fit properly, replace it with a compatible part.
- Drive normally if the vehicle has no other warning signs, then allow the diagnostic system time to recheck the emissions system.
The light may not disappear immediately. Some vehicles require several successful system checks or driving cycles before the warning turns off. Others may need a scan tool to clear the stored code after the fault has been repaired.
Important: Tightening the gas cap is a useful first check, not a universal fix. If the warning remains on, scan the vehicle for trouble codes instead of repeatedly removing the cap or assuming the problem is resolved.
3. Disconnect the Battery — Use Caution
Some older vehicles may clear certain stored diagnostic codes when the battery is disconnected. However, this approach is not reliable across modern vehicles and is generally less useful than an OBD-II scanner.
Disconnecting the battery can erase radio presets, clock settings, learned engine adjustments, and other stored information. Depending on the vehicle, it may also trigger security-system issues, require special relearning procedures, or affect electronic components.
For these reasons, battery disconnection should not be your first choice for resetting the check engine light.
If your vehicle manufacturer’s service instructions specifically permit this procedure, follow them exactly. Before touching the battery, check the owner’s manual for precautions, including battery sensor arrangements, security requirements, and the correct disconnection sequence. Never disconnect a battery while the engine is running.
If you are unfamiliar with vehicle electrical systems, have a qualified technician handle the procedure.
Most importantly, disconnecting the battery does not repair the fault. If the underlying issue remains, the check engine light may return when the diagnostic system detects the same problem again.
4. Let the Vehicle’s Diagnostic System Recheck the Repair
Some check engine warnings turn off automatically after the fault has been corrected and the vehicle completes the required diagnostic checks.
For example, if a temporary emissions-related problem has been resolved, the onboard computer may need to observe normal operation over one or more driving cycles before switching off the warning.
A driving cycle is not simply a fixed number of minutes behind the wheel. It can involve specific engine temperatures, speeds, acceleration patterns, and periods of operation. The exact requirements depend on the vehicle and the diagnostic monitor involved.
To use this approach safely:
- Correct the suspected problem first.
- Drive only if the vehicle is operating normally and no urgent warning signs are present.
- Follow the manufacturer’s recommended driving conditions when available.
- Recheck the dashboard and scan for returning codes if the light stays on.
Do not try to force the warning off by repeatedly revving the engine, driving at excessive speeds, or performing aggressive acceleration. These actions will not reliably complete the required checks and could make an existing problem worse.
5. Ask a Mechanic to Diagnose and Reset the Light
If the check engine light returns after clearing, or you cannot determine what caused it, professional diagnosis may be the most efficient option.
A technician can read stored and pending codes, examine freeze-frame data where available, check live sensor readings, and perform system-specific tests. This process can help distinguish between a failed component, damaged wiring, an air leak, or another problem that produces similar symptoms.
After the repair, the technician can clear the codes when appropriate and confirm that the problem has been addressed.
Professional help is particularly important when the warning is accompanied by rough running, stalling, loss of power, unusual noises, overheating, or other concerning symptoms.
Can You Reset the Check Engine Light Without a Scanner?
Yes, sometimes—but the available options depend on the vehicle and the reason the warning appeared.
If the cause is a loose gas cap, correcting the cap may allow the vehicle’s diagnostic system to turn off the light after successful checks. On some older vehicles, disconnecting the battery may clear certain codes, but this is not a dependable solution for modern cars.
There is no universal dashboard button or ignition-key sequence that safely resets the check engine light on every vehicle.
For most drivers, an OBD-II scanner is the most practical option because it can reveal the stored codes before they are cleared. This helps prevent you from erasing useful diagnostic information without understanding the problem.
If you do not own a scanner, a repair shop or automotive parts retailer may be able to help you retrieve the codes. Services and availability vary, so confirm what is offered before visiting.
Why Does the Check Engine Light Come Back After Resetting?
If the light returns shortly after being cleared, the underlying problem may still be present or the vehicle’s diagnostic system may have detected another fault.
Common reasons include:
1. The original problem was not repaired. Clearing a code removes its stored status but does not fix a leak, damaged wire, failing sensor, or mechanical fault.
2. The replacement part was incorrect or defective. A new component may not meet the vehicle’s specifications, or the original diagnosis may have been incomplete.
3. The fault is intermittent. Loose electrical connections, temperature-sensitive components, or occasional misfires may only trigger a warning under certain conditions.
4. The repair requires further verification. Some diagnostic monitors need particular operating conditions before they can confirm that a fault has been resolved.
5. A separate problem has developed. More than one issue can exist at the same time, especially in an older vehicle.
The best next step is to retrieve the current codes and compare them with the original records. Avoid repeatedly clearing the warning without investigating why it returns.
How Long Does It Take for the Check Engine Light to Reset?
There is no single timeframe that applies to every vehicle.
- After using a scanner: The stored warning may clear immediately if the system accepts the command, but the repair still needs verification.
- After tightening the gas cap: The warning may take several successful system checks or driving cycles to turn off.
- After a repair: The light may stay off immediately, or the vehicle may need to complete additional diagnostic checks.
- After disconnecting the battery: The light may disappear temporarily, but the original fault can trigger it again.
If the warning remains on after the repair, scan for diagnostic codes rather than waiting indefinitely. If the vehicle has serious symptoms, do not continue driving simply to see whether the light resets.
Does Resetting the Check Engine Light Clear the Problem?
No. Resetting the check engine light does not repair the component or system that caused it to illuminate.
Think of the light as a warning message from your vehicle’s diagnostic system. Clearing the stored code removes or resets information in the system, but it does not necessarily change the physical condition that triggered the warning.
For example, clearing a code related to an engine misfire will not repair worn spark plugs, a failing ignition coil, or a fuel delivery problem. If the fault remains, the vehicle may detect it again.
A proper repair involves three steps:
- Identify the underlying cause.
- Correct the fault using the appropriate repair procedure.
- Clear the code when suitable and verify that the issue does not return.
This approach is more reliable than treating the warning light itself as the problem.
Is It Safe to Drive After Resetting the Check Engine Light?
It depends on how the vehicle is behaving and what caused the warning.
If the problem has been repaired, the engine runs normally, and no other warning signs are present, ordinary driving may be appropriate while you monitor the vehicle and complete any required diagnostic checks.
However, a light that disappears after a reset does not prove that the car is safe. A serious fault may still be present even if the dashboard warning has temporarily gone away.
Stop driving as soon as it is safe to do so if you notice any of the following:
- A flashing check engine light, particularly with engine shaking or misfiring
- Severe loss of power or repeated stalling
- Overheating or a temperature warning
- Oil pressure warning
- Smoke, a strong burning smell, or unusual mechanical noises
For these symptoms, follow the vehicle’s instructions and arrange professional assistance. Do not restart or drive the vehicle if doing so could cause further damage or create a safety risk.
Common Mistakes to Avoid When Resetting the Check Engine Light
Resetting the warning is straightforward with the right equipment, but a few mistakes can make diagnosis and repair more difficult.
Clearing Codes Before Recording Them
Always record the diagnostic trouble codes before erasing them. Depending on the vehicle and scanner, clearing codes may remove freeze-frame information that would help a technician understand the conditions under which the fault occurred.
Assuming Every Code Means a Failed Part
A code identifies a detected condition or a system that needs investigation. For example, an oxygen-sensor-related code does not automatically prove that the sensor itself is defective. Wiring, exhaust leaks, fuel mixture problems, or other faults may be responsible.
Replacing Parts Without Diagnosis
Changing components based on guesswork can waste money and leave the original problem unresolved. Use the code as a starting point, then confirm the cause with appropriate tests.
Disconnecting the Battery Without Checking the Manual
Modern vehicles may have manufacturer-specific battery procedures and electronic relearning requirements. Unplanned disconnection can cause avoidable complications.
Ignoring a Flashing Warning
A flashing check engine light can indicate a condition that risks damaging the catalytic converter. Do not treat it as a routine maintenance reminder or keep resetting it.
Resetting the Light Before an Emissions Test
Clearing diagnostic codes can reset emissions readiness monitors. Your vehicle may then be considered not ready for an inspection, even if the warning light is off. Check local testing requirements and confirm the vehicle’s readiness status before attending an emissions test.
How to Prevent the Check Engine Light From Coming On Again
Although not every fault can be prevented, consistent maintenance can reduce the likelihood of many engine and emissions-related problems.
- Follow the maintenance schedule. Replace spark plugs, filters, and other service items at the intervals specified for your vehicle.
- Use the correct fuel and fluids. Follow the owner’s manual for fuel grade, engine oil, and other required fluids.
- Check the gas cap. Make sure it fits correctly and replace it if the seal is damaged.
- Address performance changes early. Rough idling, hesitation, hard starting, reduced fuel economy, and unusual smells can signal a developing problem.
- Inspect visible wiring and hoses. Look for obvious damage, disconnected connectors, or deteriorated hoses when the engine is off and cool.
- Avoid ignoring recurring warnings. A problem that seems minor today may become more expensive if left unresolved.
- Keep repair records. Recording diagnostic codes, repairs, and service dates can help identify recurring issues.
Preventive maintenance cannot guarantee that the check engine light will never appear, but it can help you detect problems earlier and avoid unnecessary repairs.
Frequently Asked Questions
1. How do I reset the check engine light manually?
There is no universal manual reset procedure for every car. Correcting a simple issue, such as a loose gas cap, may allow the light to turn off after the diagnostic system rechecks it. An OBD-II scanner is generally the most reliable way to clear stored codes after repairs.
2. Will the check engine light turn off by itself?
Yes, in some cases. If the fault has been corrected, the vehicle may switch off the warning after it completes the required diagnostic checks. The time required varies by vehicle and fault type.
3. Can I disconnect the battery to reset the check engine light?
Some vehicles may clear certain codes after battery disconnection, but this method is unreliable and can reset other electronic settings. Check the owner’s manual and prefer a compatible diagnostic scanner.
4. How long should I drive after tightening the gas cap?
There is no universal mileage or time requirement. The vehicle may need several successful diagnostic checks or driving cycles. Follow the manufacturer’s guidance and scan for codes if the warning remains on.
5. Will resetting the check engine light improve fuel economy?
Not by itself. Fuel economy may improve if the underlying problem is repaired, but clearing the code alone does not fix a faulty sensor, misfire, air leak, or fuel system issue.
6. Does resetting the check engine light erase diagnostic codes?
Usually, a clear-codes command removes applicable stored codes and may erase associated diagnostic information. It can also reset emissions readiness monitors. Some codes or warnings may remain, depending on the vehicle and fault.
7. Can a check engine light be reset without fixing the problem?
It may be possible to clear the warning temporarily, but the fault remains. The light may return when the onboard diagnostic system detects the issue again. Repairing the cause is the correct long-term solution.
8. Why is my check engine light still on after I reset it?
The fault may still exist, the system may not have accepted the reset, or a related problem may have been detected. Retrieve the current codes and investigate the cause rather than repeatedly clearing the warning.
9. Can I pass an emissions test after resetting the light?
Not necessarily. Clearing codes may reset readiness monitors, which can cause an emissions inspection to report that the vehicle is not ready. Requirements vary by location, so check local rules and confirm readiness before testing.
10. Should I reset a flashing check engine light?
No. A flashing warning can indicate an active misfire or another serious condition. Reduce engine load, stop in a safe location, and arrange professional assistance if the warning continues or the vehicle runs abnormally.
Final Thoughts
Knowing how to reset the check engine light can save time and help you manage minor vehicle issues, but the safest approach is to identify the cause before clearing the warning.
For most modern vehicles, an OBD-II scanner provides the clearest starting point: retrieve the trouble codes, record the information, correct the underlying fault, and clear the codes only when appropriate. If the light returns, investigate further rather than repeatedly resetting it.
Most importantly, take a flashing check engine light, severe engine symptoms, or other urgent dashboard warnings seriously. A careful diagnosis and proper repair protect your vehicle, reduce the risk of expensive damage, and help keep you safe on the road.
Share this content: